

Thermal optics have revolutionized predator and hog hunting, giving outdoorsmen a powerful edge after the sun goes down. But before you can hit the field with confidence, you need to make sure your thermal scope is properly zeroed. If you're coming from the world of daytime scopes, the process is similar—but with some key differences. Let's walk through everything you need to know to zero your thermal optic effectively, safely, and with precision.
Understanding the Basics: Thermal vs. Day Optics
If you're used to sighting in traditional daytime scopes, you’re familiar with dialing “up” or “right” to move the point of impact. With thermal optics, it's almost the opposite. Most thermal sights adjust by moving the reticle itself, not the impact point.
Think of it like sighting in a bow—you follow the arrow. If your shot lands low and left, you move the reticle down and left to meet the impact. This is the key mindset shift when zeroing thermals. It's intuitive once you get the hang of it, but easy to misapply if you're thinking like you're behind a traditional scope.

Using Your Scope’s Zeroing Menu
Modern thermal sights like those from Nocpix include smart software features to help with zeroing. In the zeroing menu, you'll usually see two sets of crosshairs or indicators:
- The original zero position
- Your new reticle position
As you adjust, the screen will also show numerical coordinates for the new position. These numbers matter—once you've established a solid zero, write them down and keep them with your rifle or in a field notebook. This can save you the step of re-zeroing after a firmware update or accidental settings reset.
Nocpix optics also offer a freeze-frame function to assist with one-shot zeroing. This is a slick feature that lets you freeze the display after a single shot, so you can move the reticle to the point of impact without worrying about the target shifting or heat signatures changing. Reference your owner's manual for the exact steps on this—it's well worth learning.
Do You Need to Zero in the Dark?
The beauty of thermal optics is seeing in the dark—but that doesn’t mean you need to zero in the dark. In fact, we recommend zeroing during the day whenever possible. Daylight conditions allow for better visibility, increased safety, and more controlled shooting. The key is using a target that stands out thermally. Just make sure you are not pointing your thermal optic in the direction of the sun, as that can critically damage your sensor.

Thermal Zeroing Targets That Work
You’ve got options when it comes to thermal targets. Here are a few proven methods:
- Factory Heat Targets (like Nocpix’s thermal target):
- These are small, adhesive-backed heat packs designed to give off a consistent thermal signature. Easy to use and highly visible through your scope
-
Hand Warmers:
Readily available and cheap, hand warmers emit heat well but can be bulkier and less precise than dedicated thermal targets. -
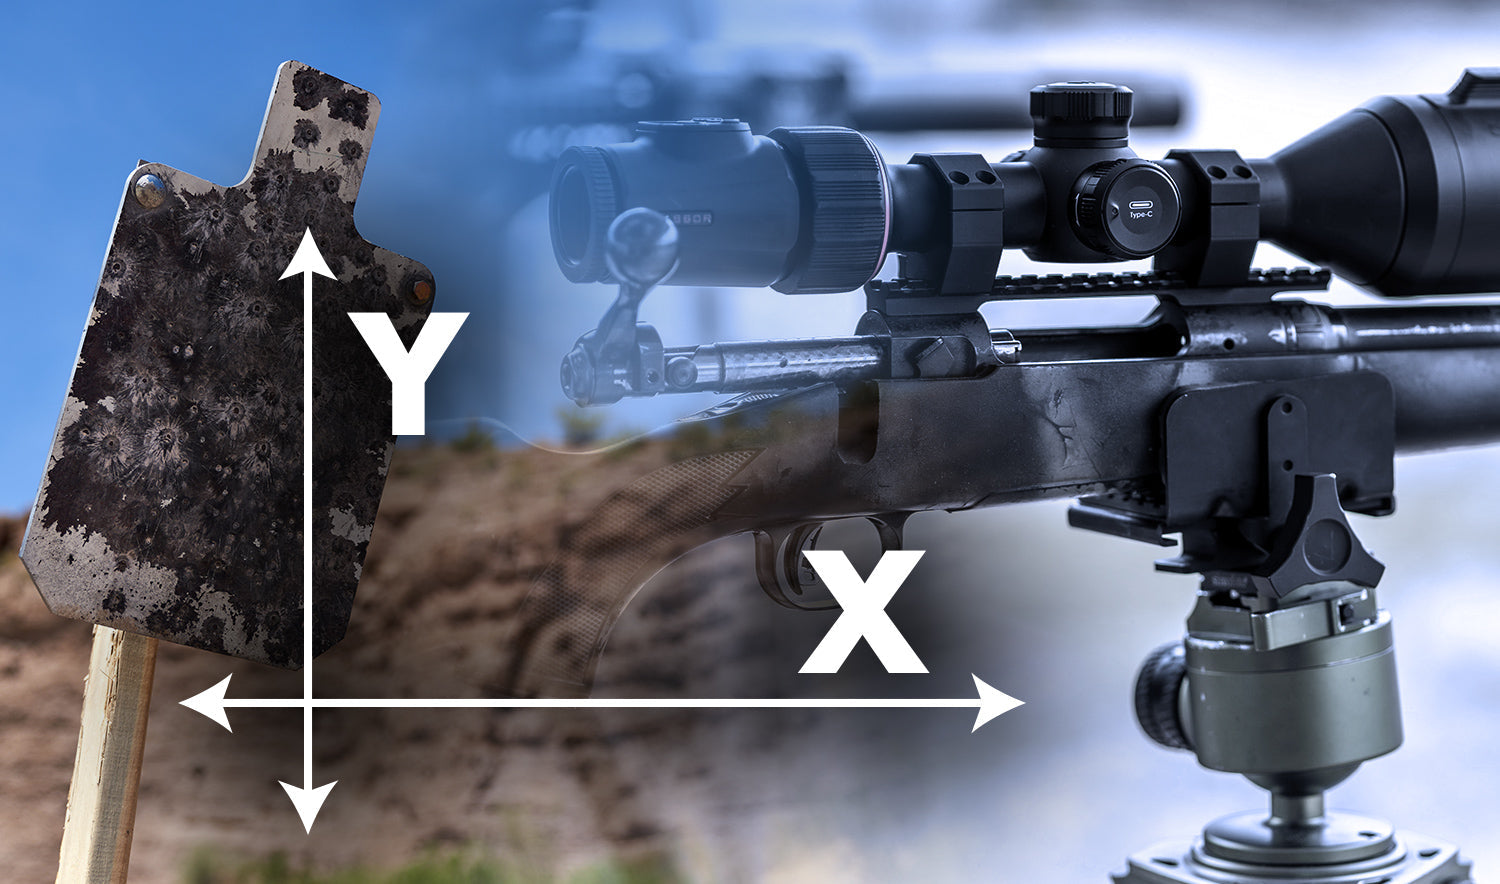
Steel Plates in the Sun:
If it’s a sunny day, steel targets absorb heat and stand out nicely against cooler backgrounds. Plus, you get the audible feedback of a hit. -
Aluminum HVAC Tape on Insulated Backers:
Stick a strip of HVAC foil tape on cardboard or foam board. The foil reflects infrared differently from the backing, creating strong contrast. This method is especially effective and inexpensive. -
Heated Metal Objects:
Heat a shell casing or a small metal cap with a lighter or torch and place it on your target. It’s an old-school method that still works.

Whatever you use, just make sure your impacts are visible. One of the easiest ways to derail a good zeroing session is not being able to see your hits. Use a spotting scope, binoculars, or even a day scope on a second rifle to track your groups. Some modern outdoor ranges have target camera systems—if available, use them.
Start Close, Then Stretch Out
Precision rifle shooters often zero at 100 or 200 yards. With thermal, especially for predator or hog hunting, that’s usually overkill. Start at 25 or 50 yards. Get your point of impact on paper and make your major adjustments early. From there, stretch to your final zero distance—typically 50 or 100 yards—with confidence.
This method keeps your first few shots efficient and your reticle adjustments smaller as distance increases.

Stability Matters
More important than any scope feature is how stabile and consistent your rifle is during the process. Whether you're on a benchrest, bipod, tripod, or using sandbags, your platform needs to be rock-steady. An unstable shooting position introduces human error and makes troubleshooting a nightmare. Also, use proven ammo. Don’t try to zero with reloads you’re testing or bargain bin rounds. Use ammunition you trust to group well. Most thermal “zero issues” turn out to be unstable mounts, poor shooting form, or inconsistent ammo—not the optic.

A Note on Ranges and Readiness
As thermal optics become more mainstream, more ranges are learning how to accommodate them—but not all are ready. Come prepared with your own targets, tape, spotting gear, and tools. Don’t expect the range staff to have thermal-specific knowledge or equipment on hand.
And finally, practice standard safety fundamentals. Just because you’re using high-tech gear doesn’t mean the rules change. Keep your muzzle downrange, watch your backstop, and communicate clearly with those around you.

Final Thoughts
Zeroing a thermal optic isn’t hard—but it is different. Approach it with a solid understanding of how the adjustments work, bring the right gear, and don’t rush the process. When your reticle is dialed in and your confidence is high, you’ll be ready to hit the field and take full advantage of what thermal technology has to offer.
Whether you’re chasing coyotes during a new moon or targeting hogs in wheat fields, a properly zeroed thermal scope can turn your next night hunt into something unforgettable.
Leave a comment
All comments are moderated before being published.
This site is protected by hCaptcha and the hCaptcha Privacy Policy and Terms of Service apply.